When it comes to indulgent desserts, red velvet brownies are a true crowd-pleaser. They combine the rich, fudgy texture of classic brownies with the vibrant color and subtle tang of red velvet cake. The result? A dessert that’s not only visually stunning but also deliciously addictive. Whether you’re a seasoned baker or a novice in the kitchen, this comprehensive guide will walk you through every step of making the perfect batch of red velvet brownies. So, let’s dive into the world of baking and discover the magic of these irresistible treats!
What Are Red Velvet Brownies?
Red velvet brownies are a delightful fusion of two beloved desserts: brownies and red velvet cake. Brownies are known for their dense, fudgy texture and deep chocolate flavor, while red velvet cake is famous for its vibrant red color, subtle cocoa taste, and slightly tangy undertones. When you combine these two classics, you get a dessert that’s as beautiful as it is delicious.
But what exactly makes a brownie “red velvet”? The secret lies in the ingredients. Red velvet brownies typically include a small amount of cocoa powder for that signature chocolate flavor, and a splash of vinegar or buttermilk to add a tangy twist. The vibrant red color is achieved with the help of red food coloring. The end result is a brownie that’s rich, moist, and perfect for any occasion.
Ingredients for Homemade Red Velvet Brownies
To create the perfect red velvet brownies, you’ll need a handful of ingredients that you likely already have in your pantry. Here’s what you’ll need:
Dry Ingredients:
- All-purpose flour: Provides the structure for the brownies.
- Granulated sugar: Adds sweetness and helps create that fudgy texture.
- Unsweetened cocoa powder: Just enough to give a hint of chocolate flavor.
- Salt: Enhances the overall flavor and balances the sweetness.
Wet Ingredients:
- Unsalted butter: Adds richness and moisture to the brownies.
- Large eggs: Help bind the ingredients together and provide structure.
- Vanilla extract: Adds a lovely depth of flavor.
- Red food coloring: Gives the brownies their iconic red hue.
- White vinegar or apple cider vinegar: Adds a subtle tang and reacts with the baking soda to help the brownies rise.
Optional:
- Cream cheese: For those who love a cream cheese swirl in their brownies.
- Semisweet chocolate chips: For extra chocolatey goodness.
Equipment Needed
Before you start baking, make sure you have the necessary equipment on hand. Here’s a quick list:
- Mixing bowls: You’ll need a few bowls to mix your dry and wet ingredients separately.
- Whisk or electric mixer: A whisk works fine, but an electric mixer will make the job quicker.
- Baking pan: An 8×8-inch baking pan is ideal for this recipe.
- Parchment paper: For lining the baking pan to prevent sticking.
- Measuring cups and spoons: Accurate measurements are key to baking success.
- Spatula: For spreading the batter evenly in the pan.
Having the right tools on hand will make the process smoother and ensure your brownies turn out perfectly.
Step-by-Step Red Velvet Brownies Recipe Instructions
Preparation Steps for Red Velvet Brownies
Before you begin mixing the ingredients, it’s important to prepare your workspace and preheat the oven.
- Preheat your oven to 350°F (175°C). This ensures that the brownies will bake evenly right from the start.
- Line your baking pan with parchment paper. This not only prevents the brownies from sticking to the pan but also makes it easier to lift them out once they’re baked.
- Measure out your ingredients and set them aside. Having everything ready will streamline the baking process.
Mixing the Ingredients for Red Velvet Brownies
Now that you’re prepped and ready, it’s time to start mixing the ingredients.
- Combine the dry ingredients: In a medium bowl, whisk together the all-purpose flour, granulated sugar, unsweetened cocoa powder, and salt until well combined. This helps ensure that the dry ingredients are evenly distributed throughout the batter.
- Mix the wet ingredients: In a separate bowl, whisk together the melted unsalted butter, large eggs, vanilla extract, red food coloring, and white vinegar. Make sure the butter has cooled slightly before adding it to the eggs to prevent curdling.
- Combine the wet and dry ingredients: Gradually add the dry ingredients to the wet ingredients, mixing until just combined. Be careful not to overmix, as this can result in dense, tough brownies.
- Optional: If you’re adding a cream cheese swirl, now’s the time to prepare it. In a small bowl, beat the softened cream cheese until smooth. Drop spoonfuls of the cream cheese mixture onto the brownie batter and use a knife to swirl it in.
- Fold in the chocolate chips (if using): Gently fold the chocolate chips into the batter, distributing them evenly.
Baking Instructions
With your batter ready, it’s time to bake your red velvet brownies to perfection.
- Pour the batter into the prepared pan: Use a spatula to spread the batter evenly across the pan, making sure it reaches all the corners.
- Bake for 25-30 minutes, or until a toothpick inserted into the center comes out with just a few moist crumbs. Overbaking can lead to dry brownies, so keep a close eye on them.
- Cool the brownies: Once baked, remove the pan from the oven and let the brownies cool in the pan for about 10 minutes. Then, lift them out using the parchment paper and transfer them to a wire rack to cool completely.
Cooling and Cutting
Cooling your brownies properly is crucial for achieving clean, even cuts.
- Allow the brownies to cool completely: Cutting them while they’re still warm can cause them to crumble or stick to the knife.
- Cut into squares: Once the brownies have cooled, use a sharp knife to cut them into squares. For perfectly even pieces, wipe the knife clean between cuts.
- Serve and enjoy: Your red velvet brownies are now ready to be served! Pair them with a cold glass of milk or a hot cup of coffee for the ultimate treat.
Variations and Customizations for Red Velvet Brownies
Adding a Cream Cheese Swirl to Your Red Velvet Brownies
If you’re a fan of the classic red velvet cake with cream cheese frosting, you’ll love this variation. Adding a cream cheese swirl to your red velvet brownies takes them to the next level of decadence.
- Prepare the cream cheese mixture: In a small bowl, beat softened cream cheese with a bit of sugar and vanilla extract until smooth and creamy.
- Swirl it into the brownie batter: After you’ve poured the brownie batter into the pan, drop spoonfuls of the cream cheese mixture on top. Use a knife or a toothpick to swirl the cream cheese into the batter, creating a marbled effect.
- Bake as usual: The cream cheese will bake into the brownies, adding a rich, tangy contrast to the sweet, chocolatey flavor.
Alternative Ingredients
Whether you’re accommodating dietary restrictions or simply want to try something new, there are plenty of ways to customize your red velvet brownies.
- Gluten-free: Substitute the all-purpose flour with a gluten-free flour blend. Make sure the blend contains xanthan gum or add a teaspoon yourself to help the brownies hold together.
- Sugar alternatives: Use coconut sugar, honey, or maple syrup instead of granulated sugar. Keep in mind that using liquid sweeteners may alter the texture, so you may need to adjust the dry ingredients slightly.
- Vegan: Replace the eggs with flax eggs (1 tablespoon of ground flaxseed mixed with 3 tablespoons of water equals one egg) and use a plant-based butter substitute. For the cream cheese swirl, use a vegan cream cheese alternative.
Decorating Ideas
Want to make your red velvet brownies even more special? Here are a few decorating ideas:
- Drizzle with white chocolate: After the brownies have cooled, melt some white chocolate and drizzle it over the top for a beautiful and tasty finish.
- Top with berries: Add a pop of color and flavor by topping your brownies with fresh raspberries or strawberries.
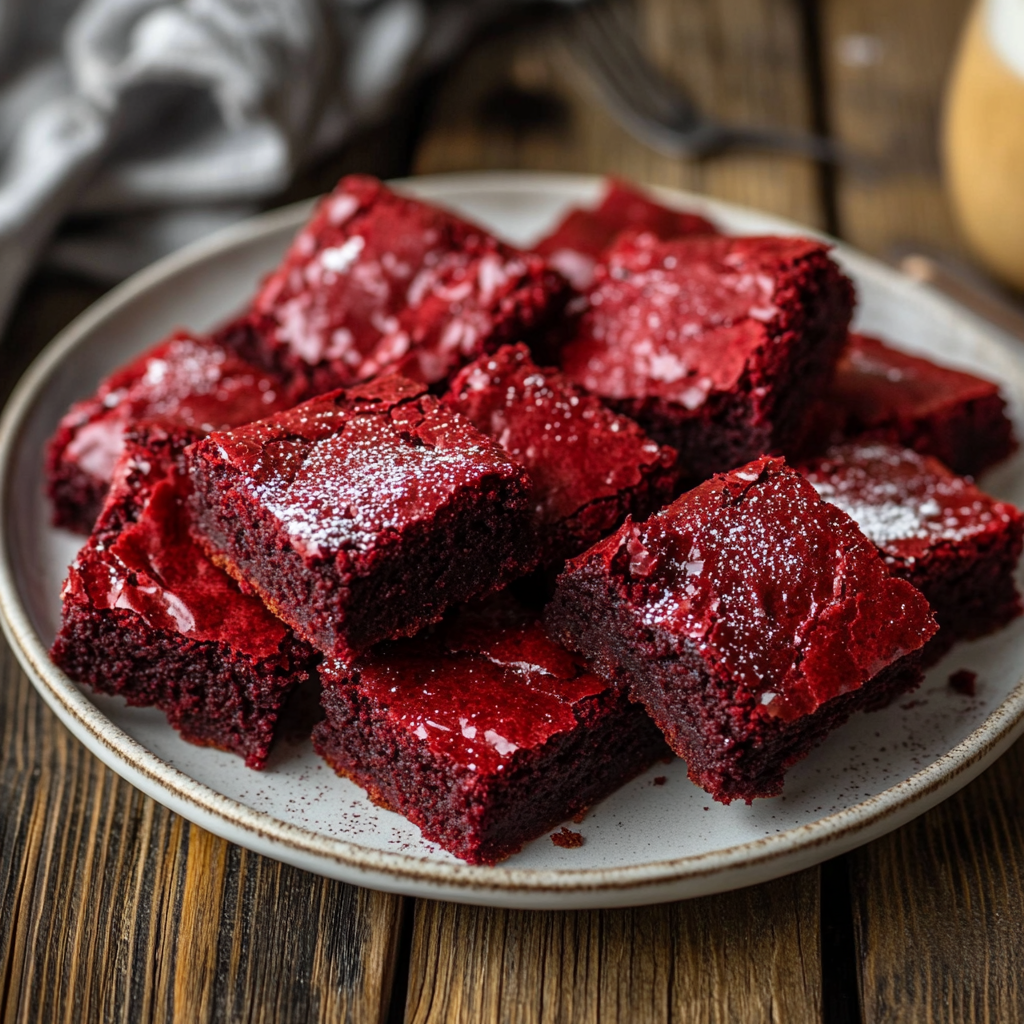
- Sprinkle with powdered sugar: A dusting of powdered sugar adds a touch of elegance and a bit of extra sweetness.
Serving Suggestions and Pairings
Now that your red velvet brownies are baked and ready, it’s time to think about how to serve them. Here are a few ideas to elevate your dessert experience:
- Serve warm with a scoop of vanilla ice cream: The combination of warm, fudgy brownies and cold, creamy ice cream is unbeatable.
- Pair with a glass of milk: The classic pairing of brownies and milk never goes out of style.
- Enjoy with a cup of coffee or tea: The rich flavor of red velvet brownies pairs beautifully with a hot beverage, making them perfect for an afternoon treat.
- Pair with another classic dessert: Consider serving your red velvet brownies alongside a traditional peach cobbler for a truly Southern-inspired dessert spread.
Nutritional Information
While red velvet brownies are undeniably delicious, it’s important to be mindful of their nutritional content, especially if you’re watching your intake.
- Calories: A typical serving of red velvet brownies contains around 200-250 calories, depending on the size of the piece and the specific ingredients used.
- Macronutrient breakdown: Each serving typically provides around 10-12 grams of fat, 3-4 grams of protein, and 25-30 grams of carbohydrates.
- Adjustments for a healthier version: To make your brownies a bit healthier, consider reducing the sugar, using whole wheat flour instead of all-purpose, or adding a bit of Greek yogurt for extra protein.
Tips and Troubleshooting
Baking is as much an art as it is a science. Even with the best intentions, things don’t always go as planned. Here are some common issues you might encounter when making red velvet brownies and how to fix them.
Common Issues and Fixes
- Brownies are too dry: This could be due to overbaking or using too much flour. Make sure to measure your flour correctly by spooning it into the measuring cup and leveling it off. Also, keep an eye on the baking time and test the brownies a few minutes before the recommended time is up.
- Brownies are too dense: Overmixing the batter can lead to dense brownies. Mix just until the ingredients are combined, and then stop.
- Brownies don’t have a crackly top: For that classic crackly top, make sure your butter and sugar are well combined before adding the eggs. Some bakers also swear by adding a tablespoon of hot water to the batter.
Expert Tips for the Best Brownies
- Use room temperature ingredients: Room temperature eggs and butter blend more easily into the batter, resulting in a smoother, more uniform texture.
- Don’t skimp on the cocoa: Even though red velvet brownies aren’t as chocolatey as traditional brownies, the cocoa is still crucial for that signature flavor.
- Let the brownies cool completely: It’s tempting to dig in right away, but letting the brownies cool completely will make them easier to cut and enhance their flavor.
FAQs
Can I use natural food coloring instead of synthetic red dye?
Absolutely! You can use natural food coloring, but keep in mind that it might not be as vibrant as synthetic dyes. Some bakers use beet juice or pomegranate juice as natural alternatives, though the flavor may be slightly affected.
How do I store red velvet brownies to keep them fresh?
Store your red velvet brownies in an airtight container at room temperature for up to three days. If you want them to last longer, you can refrigerate them for up to a week, but let them come to room temperature before serving for the best texture.
Can I make these brownies ahead of time?
Yes, you can! Red velvet brownies actually taste even better the next day, as the flavors have time to meld together. You can also freeze them for up to three months—just be sure to wrap them tightly in plastic wrap and aluminum foil to prevent freezer burn.
What makes red velvet different from regular chocolate brownies?
The main difference lies in the flavor and color. Red velvet brownies have a mild chocolate flavor with a hint of tanginess, thanks to the vinegar or buttermilk, and of course, they’re known for their striking red color. Traditional brownies, on the other hand, are more intensely chocolatey and usually don’t include any acidic ingredients or food coloring.
Conclusion
Red velvet brownies are a delightful twist on a classic dessert that never fails to impress. With their rich, fudgy texture, vibrant color, and subtle tang, they’re sure to become a favorite in your household. Whether you stick to the basic recipe or try out one of the variations, these brownies are perfect for any occasion—from festive holidays to simple weeknight treats.
So, what are you waiting for? Grab your ingredients, preheat your oven, and start baking! You won’t regret it.
Additional Resources and References
- Further Reading: Check out our cookie dough recipe guide to explore another delicious dessert that pairs well with brownies.
- Related Recipes: If you love red velvet, you might also enjoy experimenting with recipes that incorporate cottage cheese as a healthier alternative to cream cheese, or consider trying a completely different dessert like crispy air fry sweet potatoes for a savory treat.
Happy baking!